Setup Guide for LV22 USB-C to SATA HDD Enclosure

- Item name: LV22 USB3.2 Gen2 3.5” HDD enclosure with USB HUB
- Compatibility: 2.5/3.5 inch SATAI/II/III HDD or SSD
- Color: Black
- HUB: USB A *2+USB C*1
- Interface: Type-C to SATA
- Power Supply: 12V,3A
- Materials: Aluminum + ABS
- Speed: USB-C:10Gbps,Type-C HUB:10Gbps
- Size: 192x111x35MM
- System: Windows Vista/7/8/10/11, Mac OS, Linux
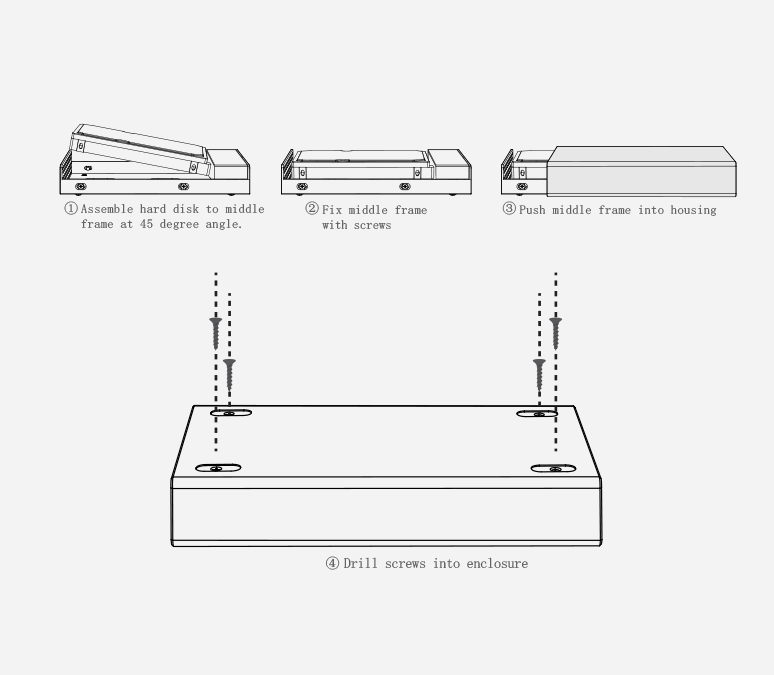
Installation
Pull out middle frame, and assemble HDD as below
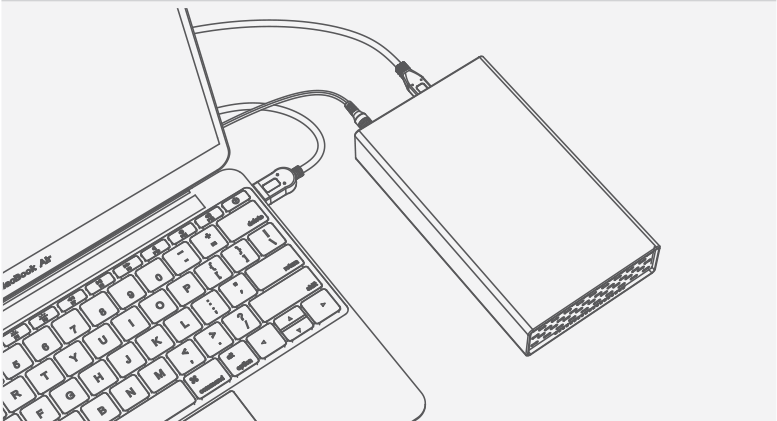
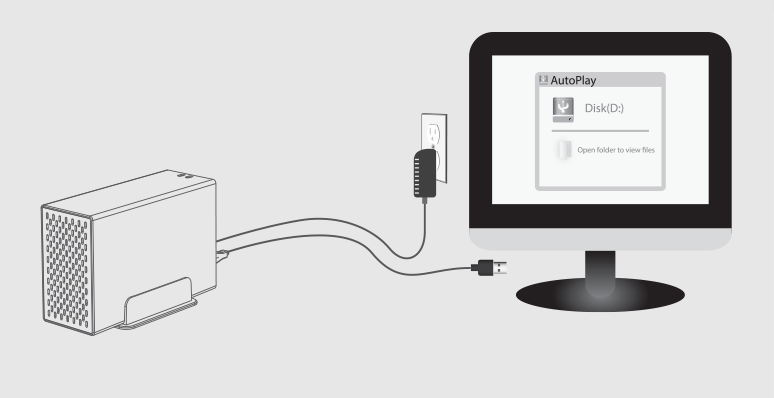
Connect USB-C cable into port on enclosure labeled “PC”.
Plug in the power adapter into enclosure and outlet.
Connect USB-C or USB-A connector into computer USB port.
New Drive Format
- Press Windows key, search "Computer Management" & Right-click.
- Click "Run as administrator".

WARNING: Reused drives only need to be plugged in and not reformatted. Formatting the drive will erase all data.
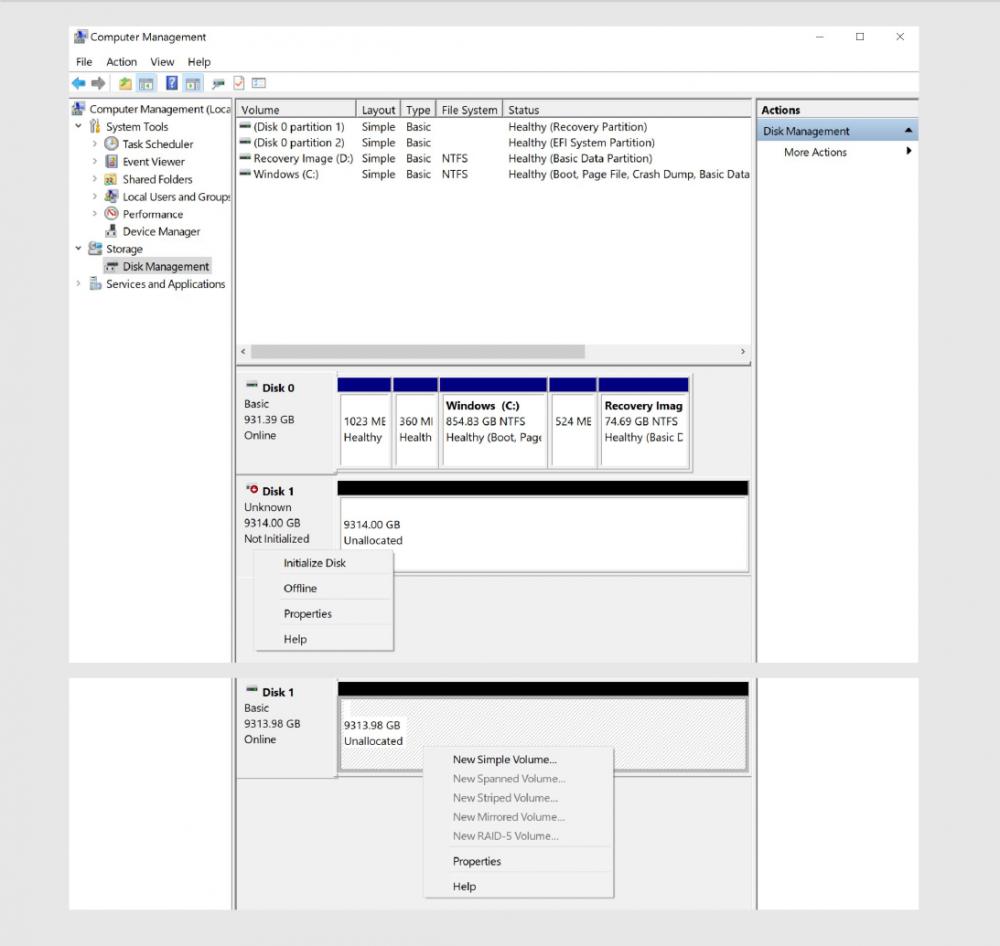
- Click on Disk Management under storage on the left-hand side.
- If uninitialized, right-click on the added drive & click
- "Initialize Disk". Skip to the next step if initialized already.
- Initialize as GPT & click "OK".
- Under "Unallocated" right-click & Select "New Simple Volume".
Drive Partition
- Click "Next" to partition all available space.
- By default, full unallocated size will be used. Select drive letter.
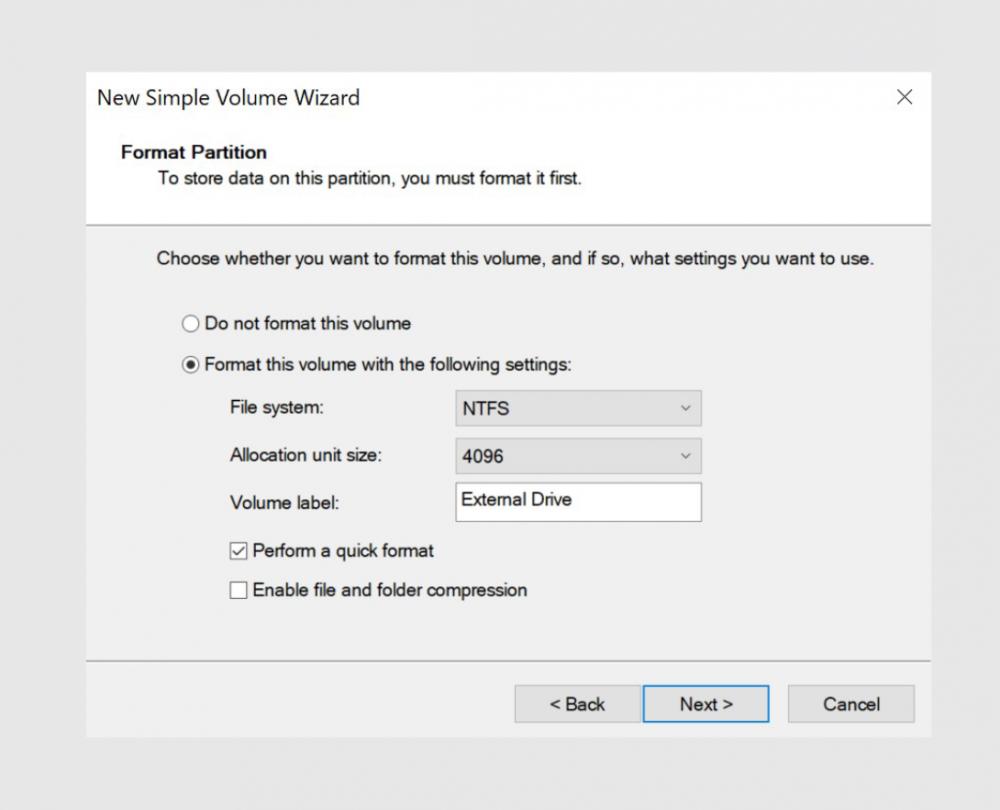
- Select exFAT file system if multiple computers are used or Mac.
- NTFS is a default file system for Windows.
- Default allocation unit size is "4096". Select default.
- Enter drive name under "Volume label".
- Uncheck "Perform a quick format" for better performance & error checking. Note: full format can take hours.
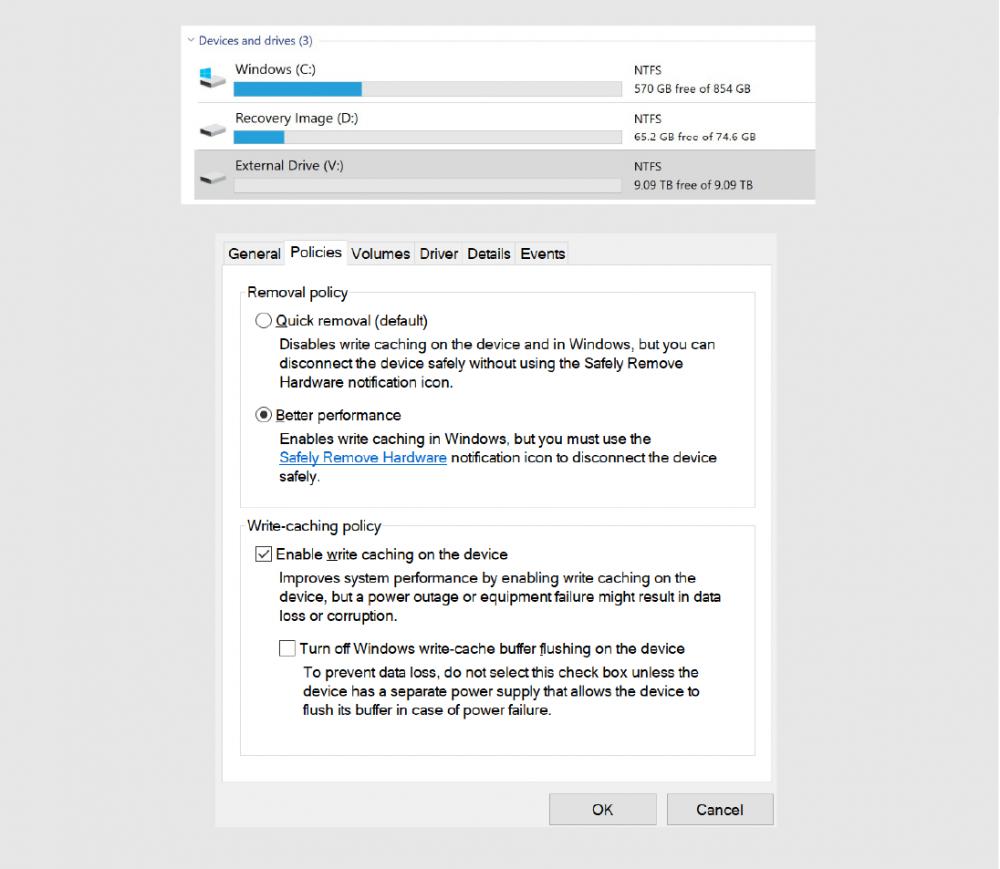
Hardware Policy
- Press "Windows key + E" to open file explorer.
- Click on "This PC" and right-click the drive then click "properties".
- Under the "hardware" tab, select the drive and click "properties" again. Click on "change settings" then go to the "policies" tab.
- Review policies for use as portable devices or higher performance devices with caching enabled.

Setup Guide for LX23 Dual Bay RAID Enclosure

- Item name: LX23 Dual Bay RAID Enclosure
- Compatibility: 3.5 inch HDD
- Interface: SATA
- Interface: Type-C to Type-A
- Materials: Aluminum alloy + ABS
- Function: Raid0, Raid1, LARGE, Normal Mode
- Size: 179x113x65 mm
- System: Windows Vista/7/8/10/11, Mac OS, Linux
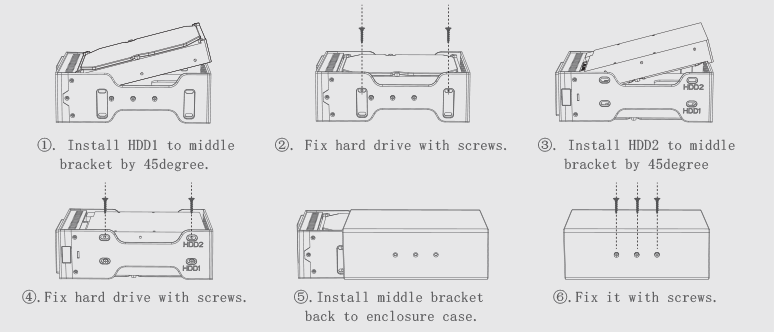
Installation
Take out middle bracket, and install 3.5”HDD or SSD to HDD1/HDD2 (45degree). Fix it with screws when you finish installing each drive.
When HDD1/HDD2 LED lights on the sides are illuminated, set the RAID mode option: RAID0, RAID1, LARGE, or Normal.
RAID Configuration
WARNING: Please back up the data before you set up/reset the RAID mode, or data will be lost!
Normal Mode (JBOD):
Normal mode is factory default.
Three RAID LEDs illuminated signify normal mode.
This mode shows each individual drive separate.

LARGE mode (SPAN):
Change RAID switch as shown below, and hold the RESET button for several seconds until the LARGE LED illuminates.LARGE mode combines the space of multiple drives as one.
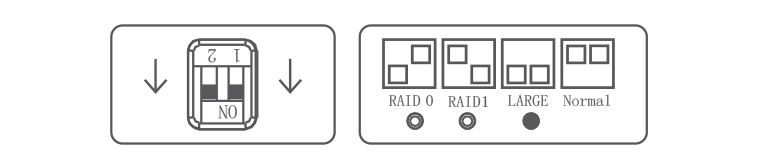
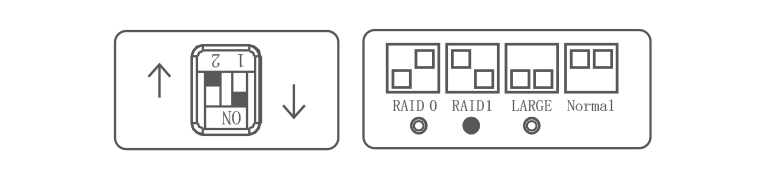
RAID1 mode (Mirror):
Change RAID switch as shown below, and hold the RESET button for several seconds until the RAID1 LED illuminates.
RAID1 mode mirrors one drive for redundancy.
Tip: When one HDD/SSD is damaged and another is replaced, make sure the replaced HDD/SSD is uninitialized or formatted.
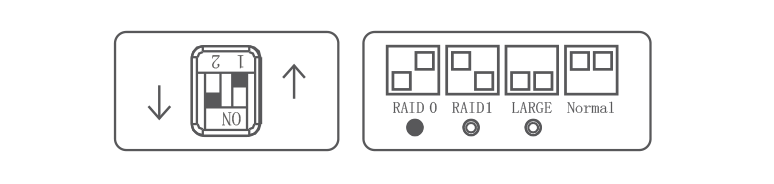
RAID0 Mode:
Change RAID switch as shown below, and hold the RESET button for several seconds until the RAID0 LED illuminates.
RAID0 combines capacity into one and doubles read speeds.
New Drive Format
- Press Windows key, search "Computer Management" & Right-click.
- Click "Run as administrator".
- Click on Disk Management under storage on the left-hand side.
- If uninitialized, right-click on the added drive & click
- "Initialize Disk". Skip to step 4 if initialized already.
- Initialize as GPT & click "OK".
- Under "Unallocated" right-click & Select "New Simple Volume".
Drive Partition
- Click "Next" to partition all available space.
- By default, full unallocated size will be used. Select drive letter.
- Select exFAT file system if multiple computers are used or Mac.
- NTFS is a default file system for Windows.
- Default allocation unit size is "4096". Select default.
- Enter drive name under "Volume label".
- Uncheck "Perform a quick format" for better performance & error checking. Note: full format can take hours.
Hardware Policy
- Press "Windows key + E" to open file explorer.
- Click on "This PC" and right-click the drive then click "properties".
- Under the "hardware" tab, select the drive and click "properties" again. Click on "change settings" then go to the "policies" tab.
- Review policies for use as portable devices or higher performance devices with caching enabled.
All done. Hope you enjoy our products.
Feel free to contact us if you need further assistance.